Customizing your event registration confirmation
Alistair Lee, Adobe Systems
Expertise Level: Intermediate
In previous tutorials, we've looked at designing custom templates for your events and the ability to customize the event information page and speaker page. Customizing the Registration Confirmation page seems like an intuitive and straightforward process, but I found that my edits weren't showing up when I tried testing my event.
Having edits not show up is pretty common for me - I often forget to activate my template which is the critical last step in the process of designing a custom template. In this case however, I knew I had activated the template and the edits were still not appearing.
As it turns out, the default behavior for an Adobe Connect event when a users submits a registration form is not to load the 'Registration Confirmation' page. I'll outline the steps here, or you can scroll to the bottom of this page to watch a short 3 minute video.
First, we're going to need to customize the template. If you're currently using one of the standard default templates, you may want to create a copy to edit. If your an Event Manager and not an Event Administrator, then you'll need to create your own personal event template since only Event Administrators can edit the shared templates. The easiest way to edit the template is to open your event in Adobe Connect Central, choose 'Edit', then scroll down to the Template dropdown listbox and select 'Edit'
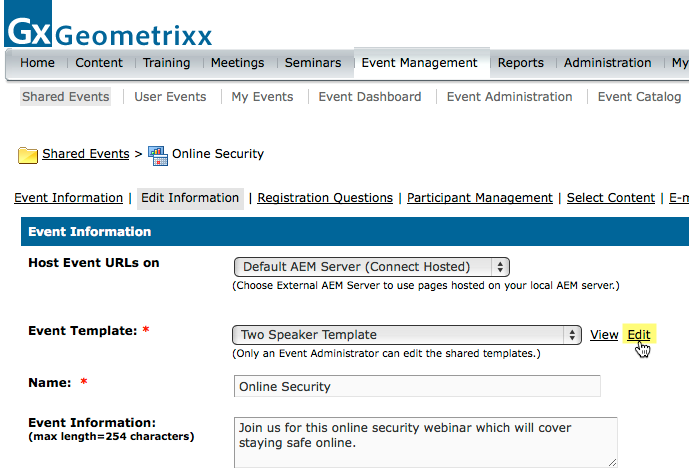
Fig.1: Finding the correct template to edit.
After opening the template in editing mode, the obvious choice seems to be to go to the 'Registration Confirmation' page and make your edits. The default behavior for Adobe Connect though is to display some text on the 'Registration' page. This is much faster than loading a full page. If you simply need to change the text, there's no need to edit the 'Registration Confirmation' page at all.
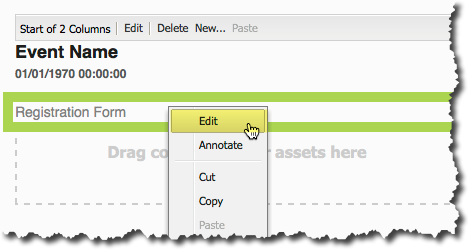
Fig. 2: Editing the registration form.
To accomplish this, go to the 'Registration' page and select the Registration Form component. You won't see any fields since this is created dynamically, but you should see the text 'Registration Form'. Right-click the component and choose 'Edit'.
At this point, you'll see a number of different actions. The first one is the one we want to edit: On Registration Confirmation. Click the arrow beside this action to see an action drop-down list and a text editor.
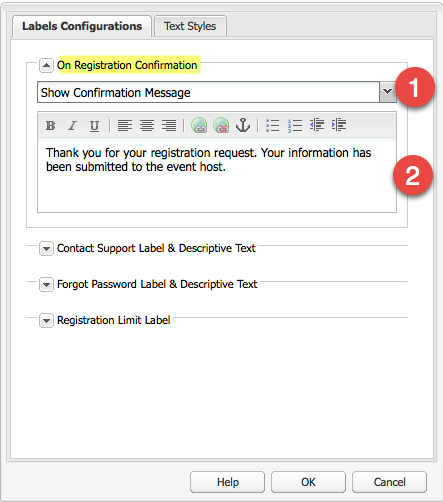
Fig. 3: Managing the Label Configurations
If you simply want to edit the text, leave the dropdown listbox set to 'Show Confirmation Message" and use the rich text edit field to enter your custom text. If you'd like to make larger edits, then you can choose the other action which is to load the 'Registration Confirmation' page. With this action selected, you can now go and make whatever customizations you'd like to the Registration Confirmation page and they will appear after someone registers for your event.
Oh, and one last thing... Don't forget to activate your template!
February 2014
<< Back to Tutorials main menu.
Member Comments
Share your thoughts. Tell us what you think about this tutorial.
Sign in to leave comments